Overview
This example shows after creating RTDB and generating code for the Simulink model, how to use the SimWB Control Center to run this model
in real-time and view, modify and log model input/output or parameters at runtime.
The SimWB Control Center is a network-based GUI client software to configure and run test and further analyze your test result. For configuration, it allows the user to create RTDB,
map RTDB items to real hardware IO, and create test with the model. At runtime, the user can view and modify model input/output or parameter. After test completed, the user can
use the embedded Data Viewer tool to review and analyze logged data for the test.
Content
Prerequisites
The cfgsrv process on the real-time host must be started before using the Control Center. To start the cfgsrv process, run "service simwb start" on your real-time host.
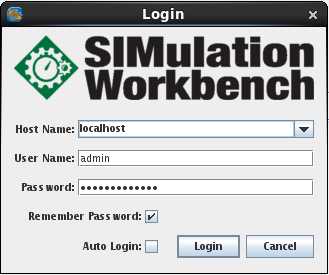
Connect to the Real-time Host
In the Login window, specify the following :
- Host Name - Name of the real-time host or IP address of the computer running the cfgsrv process (for example, 192.168.0.1)
- User name, Password - Name and password of authorized user of RTDB
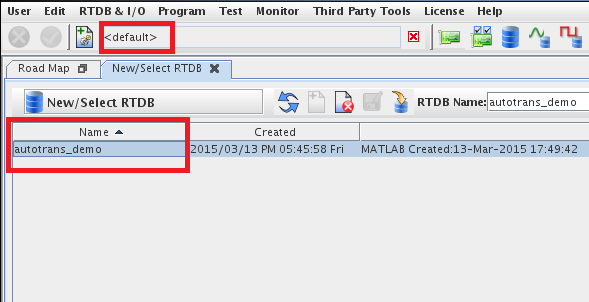
Verify RTDB for the Simulink Model
Once you log in the Control Center, make sure you are in the same Project folder as you specified in the MLToolkit Simulator Acess panel.
In this example, it's default.
Click the RTDB icon (![]() ) in the toolbar, double click the entry "autotrans_demo" to load the database.
Once the database is loaded, you will see
) in the toolbar, double click the entry "autotrans_demo" to load the database.
Once the database is loaded, you will see  at the center bottom of the Control Center GUI.
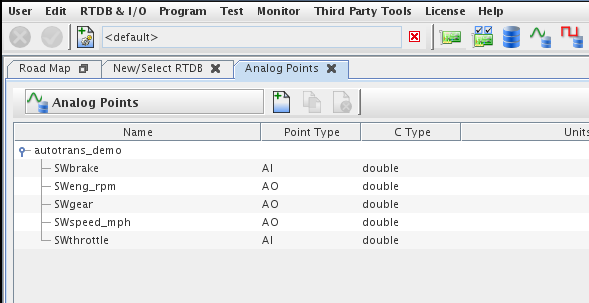
Click Analog points icon (![]() ) in the toolbar, and verify if all the selected input/output of the Simulink model
are pushed into the database.
) in the toolbar, and verify if all the selected input/output of the Simulink model
are pushed into the database.
Create Test for the Simulink Model
- Click the Test icon (
 ) in the toolbar.
 - Click New test button (
 ) to create a test.
 - Conditions -- use Default-models-RTDB
- RTDB -- make sure it's autotrans_demo
- Right click on the white space (where it says "Right click in this field to add models to the test"), and select autotrans_demo under Simulink Models.
- Click Apply button (
 ) in the toolbar to save your test.
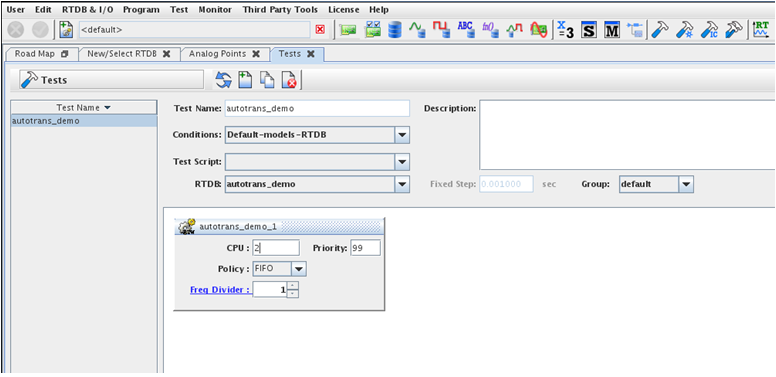
Note: once the test is created, you will not be able to modify it. If you want to modify a existing test, you can click the copy test button
(![]() ) to make a copy of the existing test and then make your changes.
) to make a copy of the existing test and then make your changes.
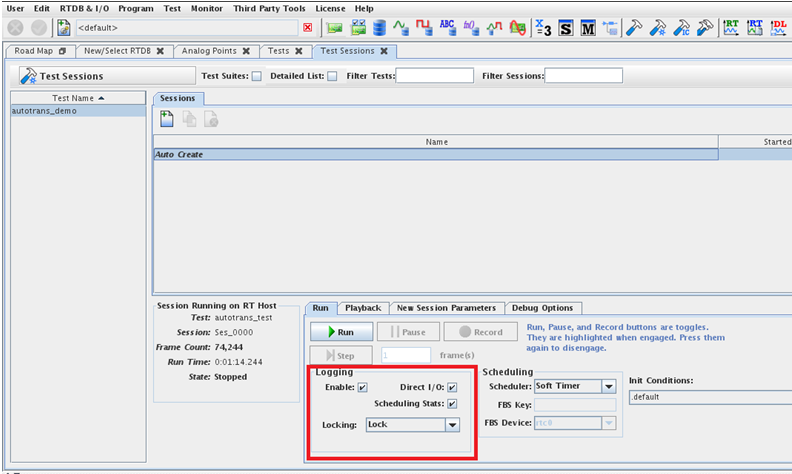
Run the Test
- Click Test Session button (
 ) in the toolbar and select the new created test in the Test Name list.
 - In the Sessions panel, select Auto Create or click the new test session button () to create a test session.
- Click
 on the Run panel to start the test.
If you want to log the RTDB items and running statistics for this run, make sure Enable, Direct I/O and Scheduling Stats are selected.
on the Run panel to start the test.
If you want to log the RTDB items and running statistics for this run, make sure Enable, Direct I/O and Scheduling Stats are selected.
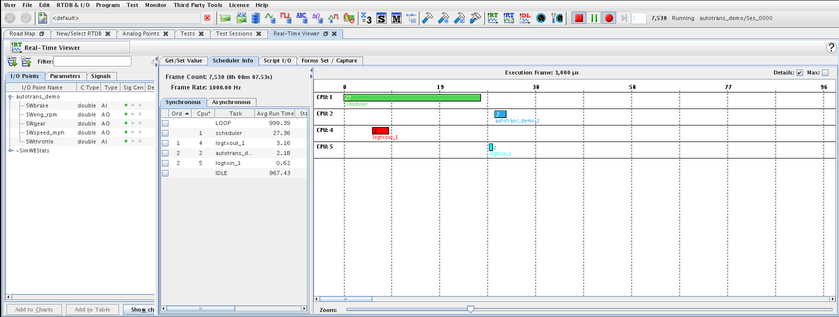
View RTDB Items at Runtime
When the test starts running, click the RT Viewer icon (![]() ) in the toolbar.
) in the toolbar.
To view the RTDB items, select the RTDB items of interest in the I/O Point panel and click  to view in a chart or
click
to view in a chart or
click  to view in the table at right.
To modify a RTDB item at runtime, first add it to the table, and then in the CVT value field enter the value you want to change
and click  to apply the value to this RTDB item.
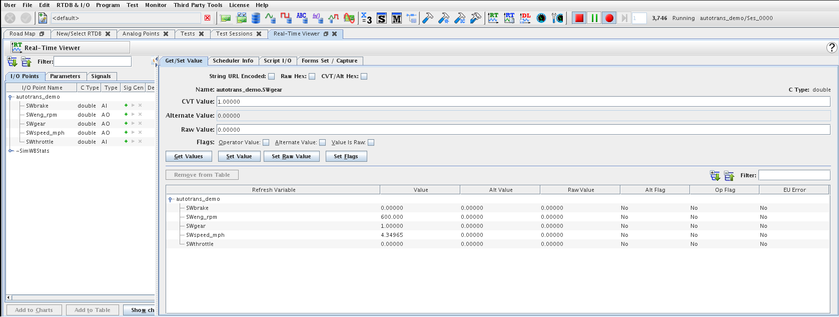
Click Scheduler Info panel, the user can also check the runtime statistics for the test.