Overview
The user can easily create customized and sophisticated HMI displays with the SimWB HMI Buider (embedded in SimWB Control Center) to manipulate model input or parameter at runtime. In the HMI Builder, the user can drag and drop the components to his display from the existing list of display widgets or creating a widgets of his own. SimWB HMI Builder supports SVG (Scalable Vector Graphics) and allows the user to control the SVG components with Javascript. Please refer to the documentation for the list of HMI widgets and properties for the widgets.
The user can create multiple HMI displays for a single SimWB test and open all the HMI displays to serve different purposes when the test is running.
Content
Introduction
SimWB HMI displays are saved as swbd files (XML format). A HMI display controls the model at runtime by mapping its elements (a button, a plot, and etc.) to a RTDB item, a model parameter or a model signal. The HMI runtime also has the ability to call some SimWB or user-defined routines. These remote function calls are executed by the guirpcsrv process. The call requests are sent via a SimWB specific protocol over the network connection that is created between the HMI runtime and the corresponding instance of the guirpcsrv process.

Example: Create a Simple HMI for autotrans_demo Test
SimWB ships the Audi A6 Dash Board HMI (audi_dash.swbd) with the autotrans_demo model. The Audi A6 Dash Board HMI shows that sophisticated HMI displays can be created by using the HMI Builder.
However, to get started, in this example, we create a simpler HMI display to run with the autotrans_demo test.
- Click button
 in the toolbar to open the HMI Builder tab.
 - Click button
 to create a new empty display.
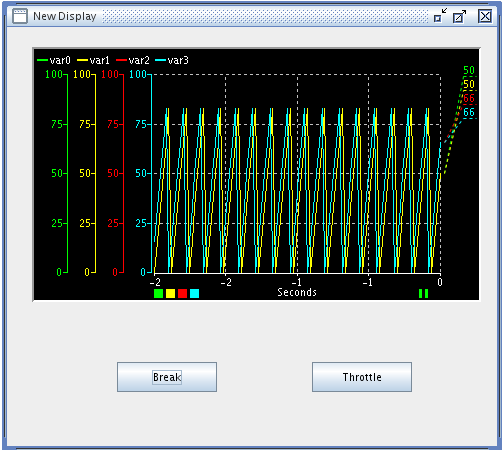
 - Drag and drop one "y VS Time Plot" to the display.
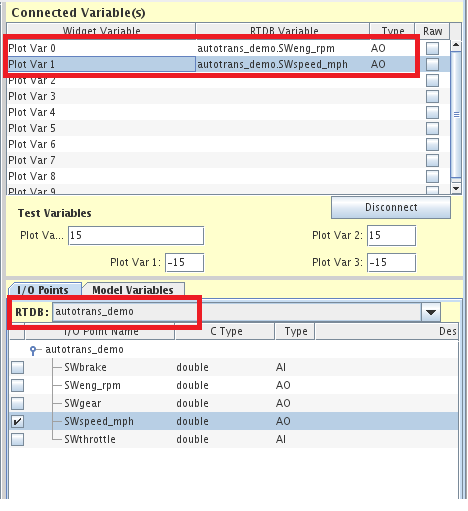
- Select RTDB autotrans_demo in the I/O points tab.
- Map Plot Var 0 and Plot Var 1 to output SWeng_rpm and SWspeed_mph /li>
- Drag and drop one and two "Action Button" to the display and name them "Throttle" and "Break" respectively.
In the propery panel, Button Properties section: - Select sendpressrelease for Action for both buttons.
- Set Paramters "1500/0" for Break button and "100/0" for Throttle button.
- Map Break button to SWbreak and Throttle button to SWthrottle.
- Save the display to autotrans_demo_test.swbd.
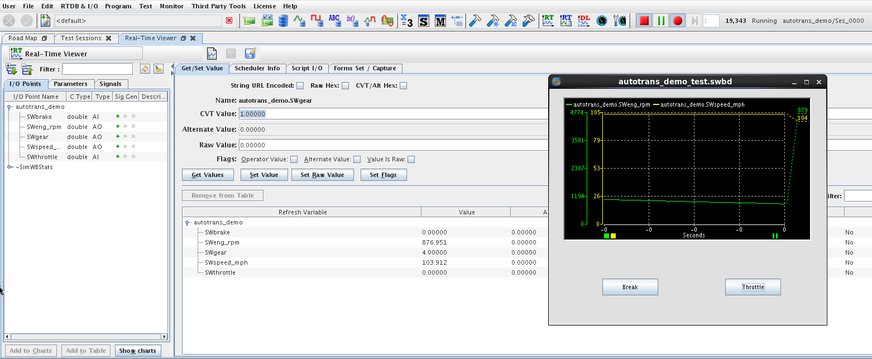
Run the autotrans_demo Test with the Example HMI
Start the autotrans_demo test and load the autotrans_demo_test.swbd, use the Throttle and Break button to control the model.