Split Multi-Level Model into Separate Models
The MLToolkit Split Model feature allows a user to choose subsystems at the root level in the original model to form separate models. Data dependencies between subsystem blocks in the original model are realized through communication between RTDB variables in SimWB. Models that have a high degree of parallelism can benefit the most from this feature. The process of RTDB creation and code generation for split models is completed via MATLAB® scripts that are generated and saved in the same directory as the original model. These scripts afford control over the step-by-step process of RTDB creation and code generation for split models.
This example discusses the Split Model feature, and demonstrates the workflow to distribute the contents of a multi-level Simulink® model into individual models that can be consumed in SimWB.
Contents
Example Model
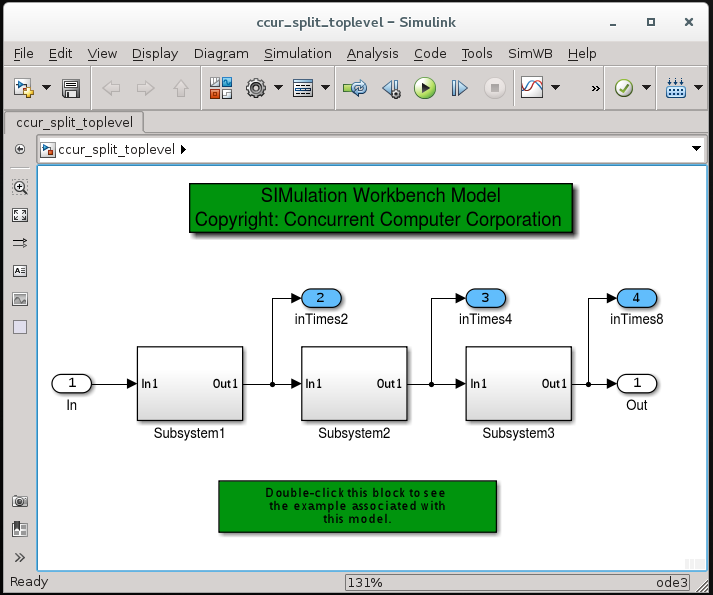
This example uses a simple model to illustrate the workflow to split a model, create the RTDB and export them. To open the model, execute the following command at the MATLAB® command prompt:
ccur_split_toplevel_model
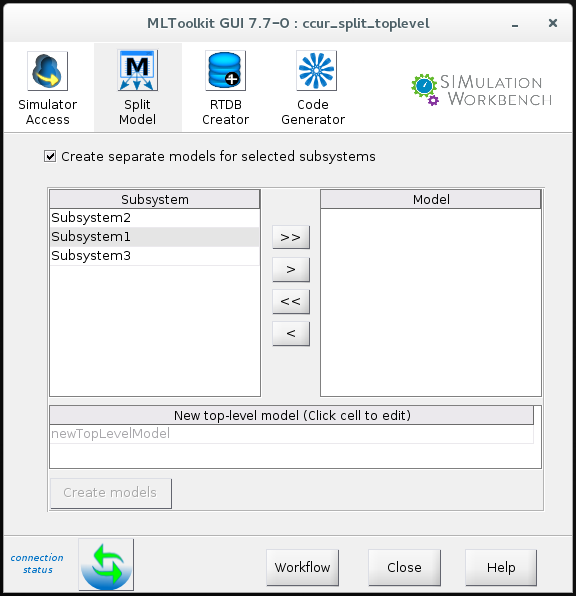
Step 1: Split Model Tab (Create Individual Models from Top-Level Model)
The Split Model tab appears empty by default. The Create separate models for selected subsystems check-box is unchecked.
The Create separate models for selected subsystems checkbox controls the visbility of the menus and controls in this tab.
- The Subsystem menu lists all the eligible subsystem blocks to create individual models.
- The > button moves a selected subsystem from the Subsystem menu to the Model menu.
- The >> button moves all the subsystems from the Subsystem menu to the Model menu.
- The < button moves a selected model from the Model menu back to the Subsystem menu.
- The << button moves all the models from the Model menu back into the Subsystem menu.
- The New top level model menu lists the name of the new top-level model that should contain the input/output blocks and remaining blocks in the top-level model following the creation of split models.
The Create models button is enabled when the Model menu contains at least one model name. The button triggers the creation of split models, which are saved in the current directory, and are overwritten if existing.
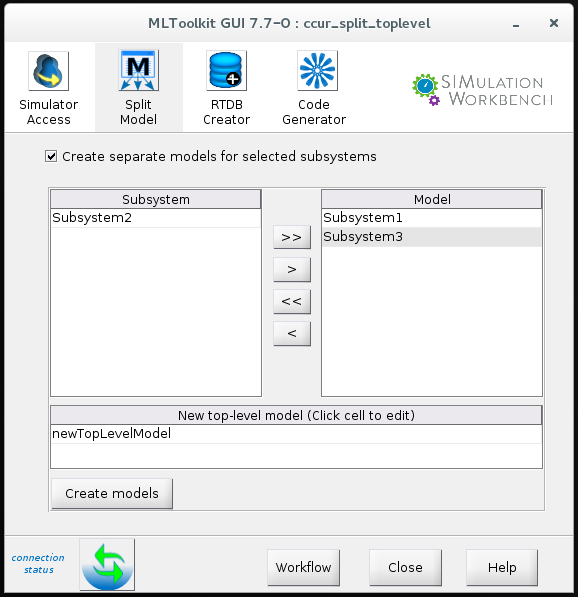
For instance, in the example model, new models named Subsystem1 and Subsystem3 will be created
and saved in the current directory.
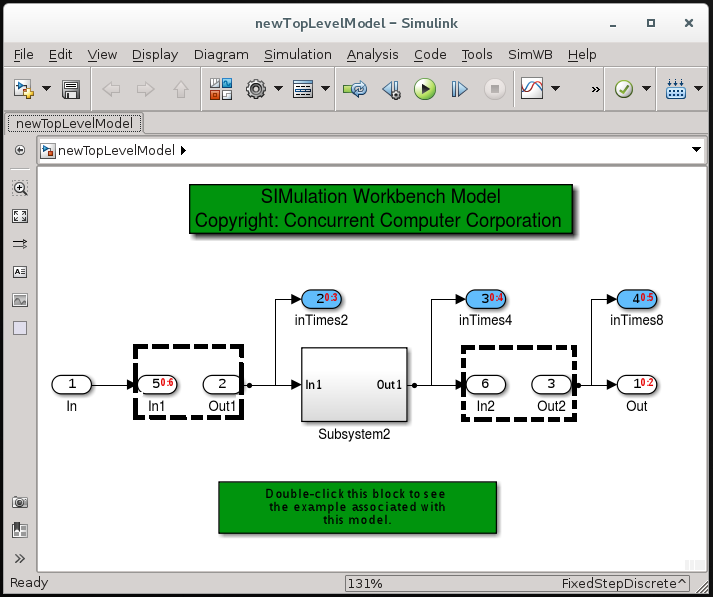
The remaining model (newTopLevelModel), also saved in the current directory, will contain
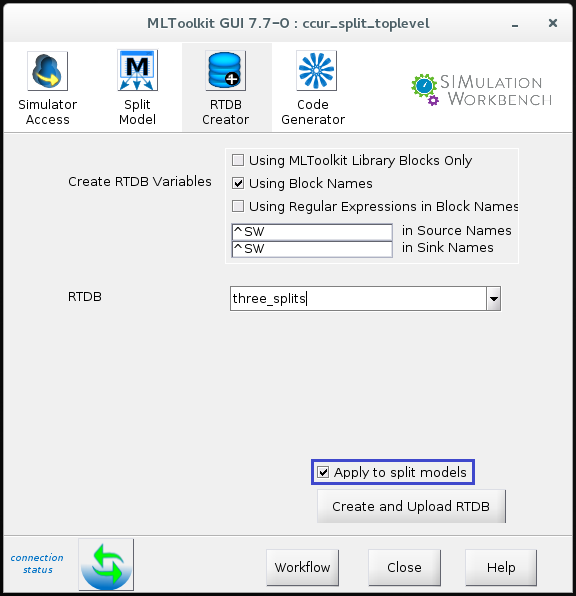
Step 2: Create RTDB for Split Models
Following the creation of split models, the RTDB can be created and uploaded on to the server. The checkbox Apply to split models needs to be checked in order for the RTDB creation process to apply to all of the newly created split models.
Note: The Hierarchical RTDB variable names option should be disabled in the RTDB Generation Preferences before this step.
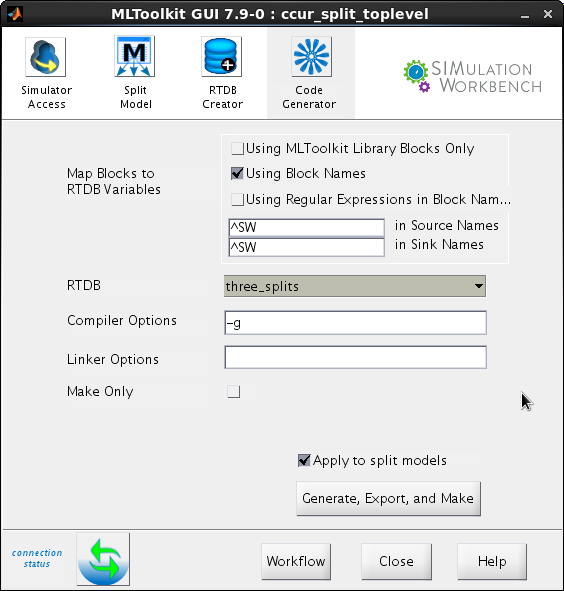
Step 3: Generate, Export, and Make Split Models
Once the RTDB is created and uploaded, the last step is to generate code for split models, export generated code, and make on the server. Similar to the checkbox in the RTDB Creator pane, the checkbox Apply to split models in the Code Generator pane needs to be checked.
Example Model Containing Buses
To apply the feature on a model containing buses, see a model ccur_split_buses.
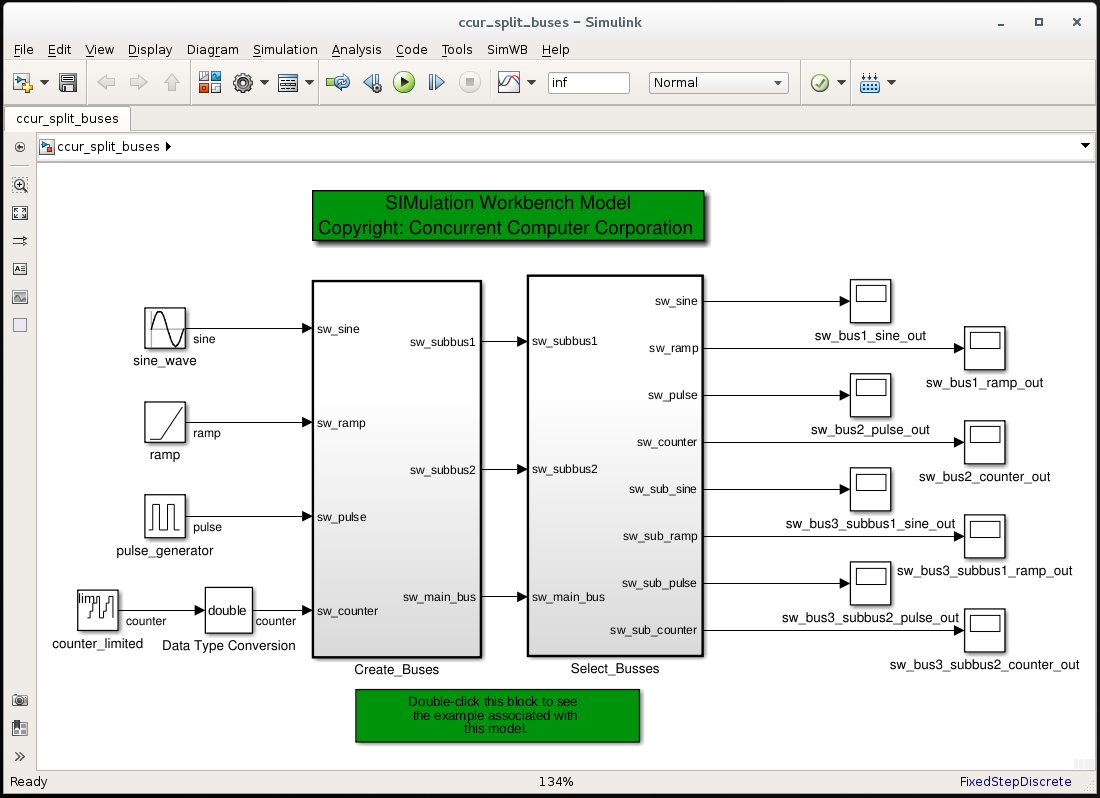
Note: Beginning MLToolkit Release 2017-3.0, if there are input/output blocks that have buses associated with them but do not have information set on the block's Data type, bus objects are automatically created in the base workspace and input/output block datatypes are appropriately set as well. It is the user's responsibility to save these data objects to a data file, and load them in the base workspace as appropriate.
Limitations
- Since the split models communicate via RTDB variables in a flat namespace, the Hierarchical RTDB variable names option must be disabled in the RTDB Generation Preferences.